Google Drive API: Difference between revisions
No edit summary |
No edit summary |
||
| Line 1: | Line 1: | ||
== Setting up your Credentials == | |||
1. Set up new project in the [https://console.developers.google.com/ Google API Console]. | 1. Set up new project in the [https://console.developers.google.com/ Google API Console]. | ||
| Line 8: | Line 10: | ||
Answer with "Web Browser (javascript)" | Answer with "Web Browser (javascript)" | ||
"What data will you be accessing?" | For "What data will you be accessing?", enter "User Data". | ||
"User Data" | |||
5. Click on "What credentials do I need?" | 5. Click on "What credentials do I need?" | ||
6. For "Authorized JavaScript origins:", | 6. For "Authorized JavaScript origins:", enter the name of your server, i.e "https://www.nsbasic.com" | ||
enter the name of your server, i.e "https://www.nsbasic.com" | |||
7. Click on Create client ID | 7. Click on Create client ID | ||
| Line 41: | Line 41: | ||
16. If the Authorize button is enabled, click on it. You are now able to access the Google Drive API. | 16. If the Authorize button is enabled, click on it. You are now able to access the Google Drive API. | ||
== Getting the list of files on your Google Drive == | |||
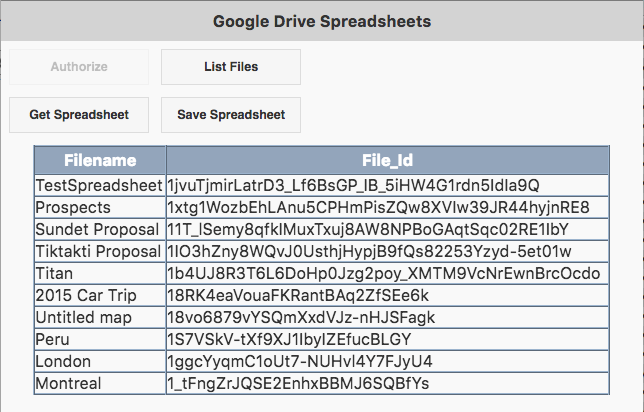
1. Click on "List Files". The files on your Google Drive will appear, along with their File IDs. | |||
[[File:GoogleDriveSpreadsheets.png]] | [[File:GoogleDriveSpreadsheets.png]] | ||
2. Get the FILE_ID for your spreadsheet from the File_Id column. Put that in the top of the app: it is hardcoded in the sample. You're welcome to use better ways to select the FILE_ID in your own app. | |||
== Reading and Writing Spreadsheets == | |||
1. Restart the app and click on Get Spreadsheet. The contents of the spreadsheet will appear. | |||
2. You can now modify the spreadsheet in your code. | |||
Revision as of 18:19, 20 May 2016
Setting up your Credentials
1. Set up new project in the Google API Console.
2. In Overview, enable Drive API
3. Go to Credentials
4. You'll see the question "Where will you be calling the API from?" Answer with "Web Browser (javascript)"
For "What data will you be accessing?", enter "User Data".
5. Click on "What credentials do I need?"
6. For "Authorized JavaScript origins:", enter the name of your server, i.e "https://www.nsbasic.com"
7. Click on Create client ID
8. On Credentials screen, select Create credentials.
9. Choose API Key
10. Choose Browser key
11. Create. Note: It may take up to 5 minutes for settings to take effect
12. Your credentials screen should now look like this: File:Credentials
13. Copy credentials: Client ID. It will look something like this: 304468290387-xxxxxxxxxxxxxxxxxxxxxxxxxxxxxxxx.apps.googleusercontent.com Copy this into the CLIENT_ID variable in your Google Drive App.
14. Copy API key. It will look something like this: AIzxxxxxxxxxxxxxxxxxxxxxxxxxxxxxxxxxxxxxxxx Copy this into the API_KEY variable in your Google Drive App.
15. Run the GoogleDriveAPI app. A permission screen should display, based on the credentials you entered. Click on "Allow".
16. If the Authorize button is enabled, click on it. You are now able to access the Google Drive API.
Getting the list of files on your Google Drive
1. Click on "List Files". The files on your Google Drive will appear, along with their File IDs.

2. Get the FILE_ID for your spreadsheet from the File_Id column. Put that in the top of the app: it is hardcoded in the sample. You're welcome to use better ways to select the FILE_ID in your own app.
Reading and Writing Spreadsheets
1. Restart the app and click on Get Spreadsheet. The contents of the spreadsheet will appear.
2. You can now modify the spreadsheet in your code.