CheckBox: Difference between revisions
Jump to navigation
Jump to search
| Line 53: | Line 53: | ||
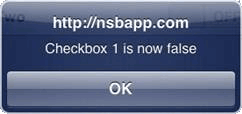
== Output == | == Output == | ||
[[file:CheckboxOutput. | [[file:CheckboxOutput.gif]] | ||
[[Category:Language Reference]] | [[Category:Language Reference]] | ||
Revision as of 06:04, 1 May 2013
- Classic jQuery Mobile
Description
The CheckBox is used to display one or more on/off controls.
While a variety of different events are available, a handy response to clicking a checkbox is to call the function <buttonID>_onchange().
To add a checkbox to your app, choose the Checkbox icon in the Toolbar, then position it on the Design Screen. Use the Property Editor to set the properties you need, then add functions to your code to respond to the events that come from the button: usually, just onchange.
Properties
Standard properties are supported, plus:
| options | A comma separated list of titles for the checkboxes. (Design time) |
| orientation | Horizontal or vertical. jQuery Mobile only. (Design time) |
| getValue(n) | Get the value of checkbox n, which will be true or false. n starts a 1 for the top checkbox. (Runtime) |
| setValue(n, val) | Sets the value of checkbox n to true or false. This function should not be called until the checkbox is fully drawn, in Sub Main or later. (Runtime) |
Events
Standard events are supported. For this control, the onchange event will be most useful.
Example (Basic)
Rem Checkbox Example

Function Checkbox1_onchange()
  MsgBox this.id & " is now " & Checkbox1.getValue(1)
End Function
Example (JavaScript)
//Checkbox Example

Checkbox1.onchange = function() {
  savethefunction_rvar="";
  _msgbox_confirm(this.id  +  " is now "  +  Checkbox1.getValue(1));
  return savethefunction_rvar;
}

