Kesbath: Press Me!: Difference between revisions
No edit summary |
|||
| Line 27: | Line 27: | ||
* Add a Button and a Label | * Add a Button and a Label | ||
* Change the Button value to Press Me! | * Change the Button value to Press Me! | ||
* The top setting does not need to be changed.
| |||
[[File:Kesbath3.png]] | |||
* Right click on the button and choose OnClick. | * Right click on the button and choose OnClick. | ||
* Enter the following code: | * Enter the following code: | ||
| Line 32: | Line 36: | ||
[[File:Kesbath4.png]] | [[File:Kesbath4.png]] | ||
* The code for the Button and label… | * The code for the Button and label… | ||
* This hides the label at the start
| * This hides the label at the start
| ||
Revision as of 15:19, 12 October 2015
A few tips before you start
1. Always use your home folder.
2. To Test your code.
Click the play button shown
3. To ‘Deploy’ your working code… Following Testing you MUST deploy the code. To do this select the Run Menu and Deploy .
This creates a folder with all the html code to run in a website.
4. Add to your website.
Move the folder onto a folder within home folder or website. Then provide a link to it, by hyperlinking to the index file in the folder created by your AppStudio deploy. The html file index.html can also be embedded into your home folder.
Part 1
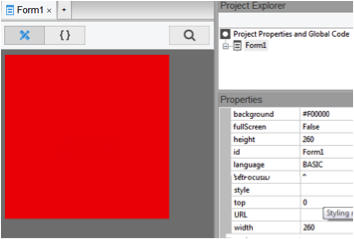
- Select a small screen size….
- Change the backgroundcolor to red.
- Change the Height and Width to values between 200 & 300
- Add a Button and a Label
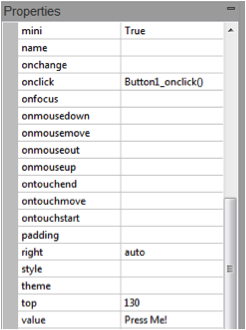
- Change the Button value to Press Me!
- The top setting does not need to be changed.
- Right click on the button and choose OnClick.
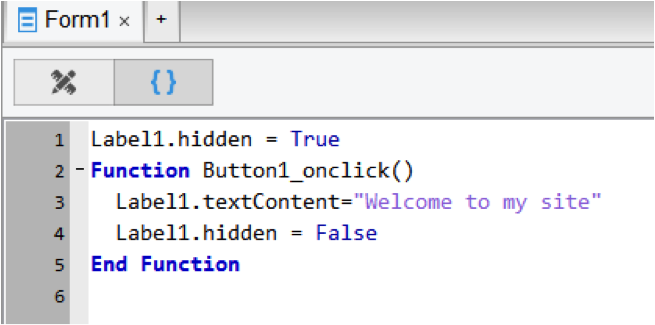
- Enter the following code:
- The code for the Button and label…
- This hides the label at the start
- Code for clicking the button
- Change the Label text
- Unhide the Label Text
- End of Button click.
Part 2
This can be extended with an image. The Image1 will need the same code as label1 to hide and then display it. The Image1 Property of src will need to pint to a valid image file.
Part 3
Test your code! That is Press the Play button or Run > Start in Desktop Browser
Part 4
After testing add the code to the index html file and test as a link from your own website! That is… Use Run and Deploy (F6) to create the folder and files that you can use in your website… Do not forget to add….. the … Additional html Code to make page run outside of AppStudio. Insert via Dreamweaver or Notepad…


