WebSockets
Background
WebSockets provides a bi-directional, full-duplex communications channels over a single Transmission Control Protocol (TCP) socket. It was designed for web browsers and web servers but it can be used by any client or server application. Ports other than 80 are frequently blocked by administrators outside of home environments, so it can be used as a way to overcome these restrictions and provide similar functionality with some additional protocol overhead while multiplexing several WebSocket services over a single TCP port. WebSockets is supported in iOS 4.2+ and Android 4.0 Chrome 25.0+. Here is a handy table summarizing support.
Purpose
This tutorial will show you how to exchange data with a server over a Tcp/IP socket. The client program, running on the device, is written in AppStudio. The server side is written in Microsoft Visual Basic 2010 Express. AppStudio is available from NSB Corporation. Visual Basic 2010 Express is available for free from Microsoft.
You are welcome to adapt the sample code for your own uses. You are also welcome to translate the Visual Basic 2010 Express code to your own preferred desktop development environment. You can find this code in the Samples folder:
c:\Program Files\NSB AppStudio\Samples\7. Web Services\WebSockets. The server side is in minidataserver.
Description of the Program
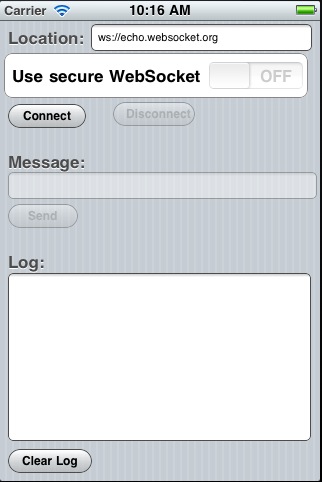
This tutorial consists of two programs. The client program, WebSockets, runs on a device, such as an iPhone, iPad or Android:
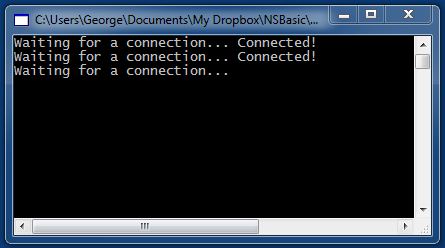
The desktop program, WebSocketsEchoServer, has a much simpler interface. It's a simple program - it simply echoes back whatever it receives. It could be a much more sophisticated program, of course: it could check a database or do other server side processing before returning as result.
If you look at the code, the server side of a websocket connection does more handshaking than what you may be used to for a socket connection.
The Location is the URL of the socket to connect to. In the next section, we will use this to connect to different servers, to see some of the ways this can be used. Operating the Sample
Testing the Program
Connecting to the Test Server
The WebSocket device sample comes with Location set to ws://echo.websocket.org. http://websocket.org is a website which provides information on WebSockets, and helpfully, has a simple echo server set up which anyone can use. This is a good place to start testing your own code. You don't need to develop your own server and client code at the same time, which can be challenging. Get your client working first, then develop your server.
Testing on the Desktop
The next step in testing is to run both the client and the server on the same desktop. Start by running WebSocketsEchoServer.exe: it will bring up a status screen saying "Waiting for a connection...".
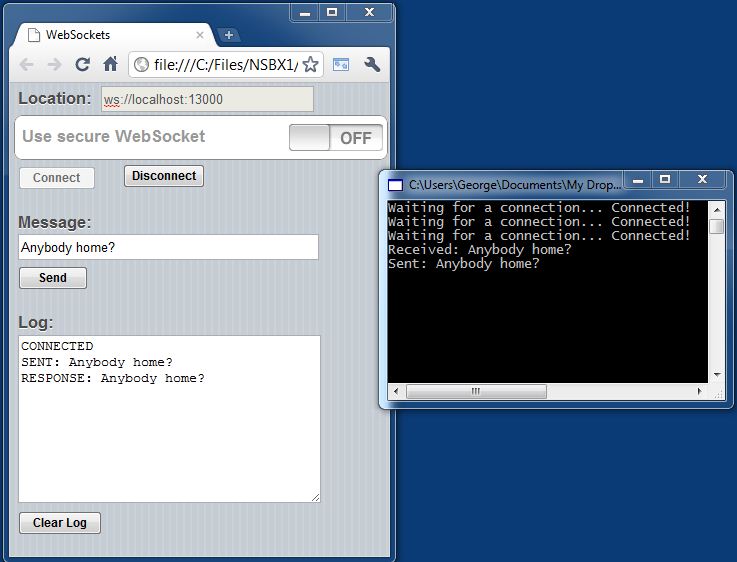
Now, go into AppStudio and load the WebSockets sample. Under the Run menu, choose the Start in Desktop Browser option. Set the Location to
ws://localhost:13000
You can now test the WebSocket. You should see this:
Testing on a Device
The next step is to test using while running on an actual device. In this case, the client program and the server program will be on different computers - perhaps even on different networks.
If your mobile device is using 3G then the server you want to connect to needs to be on the internet. If you are running the server on your desktop you'd need to setup port forwarding on your router and then connect via your internet IP. For instance:
If the server is running on port 13000 and your desktop's local IP address is 192.168.1.100, you would setup port forwarding on your router from port 13000 (or whatever you like) to port 13000 on 192.168.1.100. Then you would need to determine your internet IP address (using something like http://www.whatsmyip.org/). Then you could connect to ws://InternetIP:13000 from your 3G device and everything should work.
On the other hand, if your device is on the same wifi network as your desktop, then you should be able to connect directly to the desktop IP and port. You'll need to account for any firewall software you might be running on your desktop.


